This tutorial shows how to move all installed programs to other location in Windows 10. You will be able to move all or selected programs installed in “Program files” or “Program files (x86)” folder in “C” drive to some other folder located in “D” or other drive. This will come in handy when you are running out of disk space or you need to completely reset your Windows 10 PC. By default, there is no native feature in Windows 10 to bulk move installed programs to some other drive, but this can be done very easily using a software, named as “Steam Mover“. This software was actually designed to move Steam apps or games. But, it is very helpful to move installed programs as well.
This is a freeware which helps to first select the input location where your programs are installed and then the output location where those programs will be moved. After that, you can either select all the programs or some specific programs and run the command to move those programs.
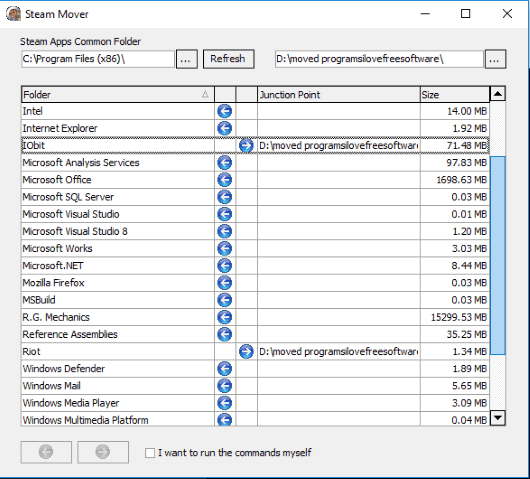
Above you can see two programs moved by me using this software. I also ran those programs and found that they are working perfectly after moving to the new location.
Note: This software works for NTFS drives only. Moreover, it can’t help you move Windows 10 Store apps and built-in programs. Only third-party products like Notepad++, some image editor, etc., can be moved. Also, this software hasn’t updated since 2010, but it works very well with Windows 10.
How To Move All or Selected Installed Programs To Some Other Location In Windows 10?
Step 1: Before moving any program, it is good to take backup of your system or create a restore point, just in case.
Step 2: Make sure the programs that you want to move are not running. If yes, simply close those programs.
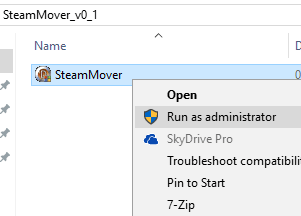
Step 3: Grab the zip file of this software and extract it. After extraction, right-click on its portable SteamMover application and select Run as administrator. This is needed so that the software can work successfully.
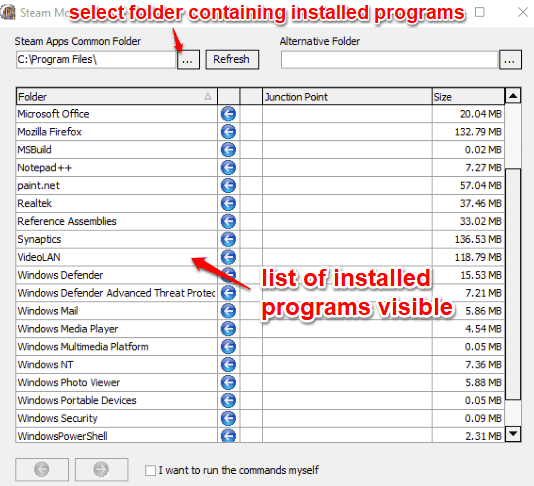
Step 4: On its interface, there are two sections: the left section helps to select a folder that contains the installed programs. Once you will select that folder, the list of all installed programs will be visible on the left section.
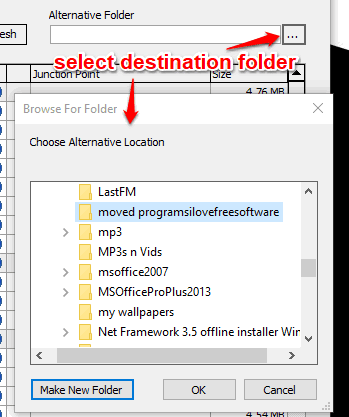
Step 5: Use the right section to select the destination folder available in some other drive. You can also create a new folder in other drive to move the programs.
Step 6: When the destination folder is selected, use the left section and select programs that you want to move. Once done, press the “next button” available on the bottom left side on its interface.
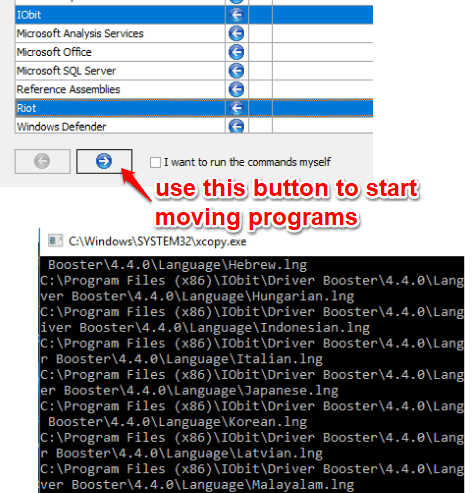
That’s it! Now the software will execute the command and start moving DLL files and other files of programs one by one to the destination folder.
This process may take some time if there are a lot of installed programs and their size is big.
You may also check Move Applications of All Desktops To Current Desktop In Windows 10.
The Conclusion:
Instead of first uninstalling the programs and then re-installing them to some other drive in your Windows 10 PC, you can take the help of this software. Just carefully follow the steps mentioned in this tutorial and you can bulk move installed programs to some other location in Windows 10.