Formspark provides a free forms backend for developers. Here you can use this forms’ backend to receive form data from multiple web forms and export that. It can even receive files and offers an intuitive dashboard where you can manage the submissions. But the best part is that you can use it with your team. It lets you invite unlimited members in your team who can manage submissions and forms.
Here you will not get a from builder as it only provides you a backend. But here it does offer some extra features that those form builders lack. For instance, here it has an analytics dashboard that you can use to track the frequency of submissions over time. On top of that, it integrates very well some popular JavaScript and JamStack frameworks such as React, Jekyll, Alpine.js, Hugo, Eleventy, and WordPress.
The free plan of Formspark lets you receive 250 submissions in a month. You can create unlimited forms, but you will only get 1 workspace in the free tier. If you upgrade, then you will be able to create multiple workspaces to separate forms for different purposes. The UI is very simple and for each form that you create here you will get a new endpoint which you can use in “action” attribute of your form.
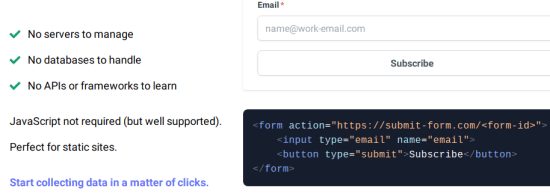
Free No Code Forms Backend for Developers with File Uploads
You can start by simply creating a free account. Here it doesn’t have a traditional login system. You just enter your email address on homepage of Formspark and it will then email you the magic link that you can use for signing in.
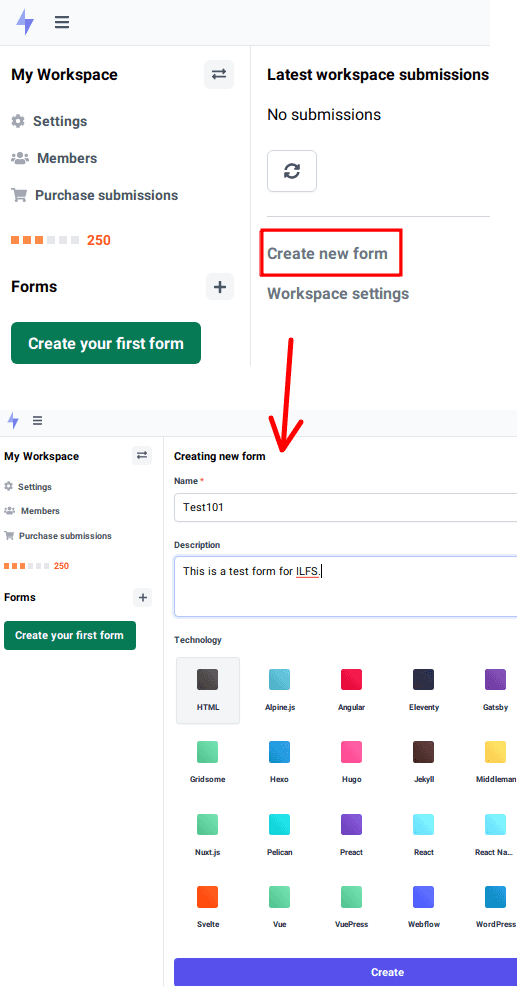
After you sign in, you will land on the main dashboard. Here you get a default workspace and can start adding a form right away. So, just create your first form backend by specifying a name. Next, you select the framework you want to use it on.
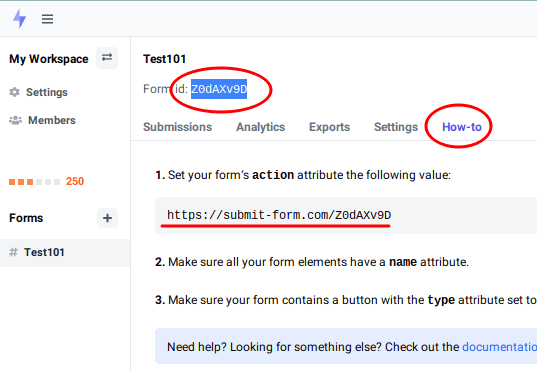
It will give you a form ID that you have to use in the action URL. In the form settings, you can just go to the “How-to” tab to see how to use it. There is a base endpoint URL and you just append the form ID to use it. The form ID will be different for each form that you create here.
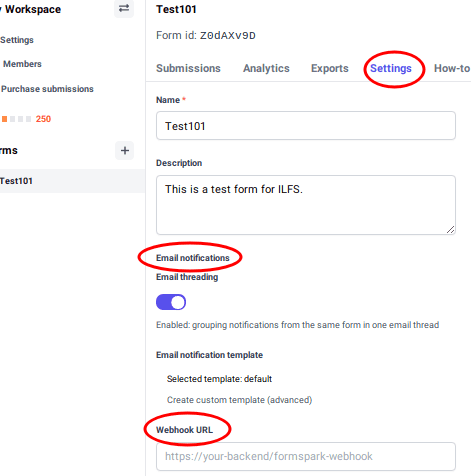
By default, it supports email notifications and you can configure there them easily. Additionally, apart from email notifications, you can opt to redirect the form data to a webhook. So, switch to the Settings tab and from here you can specify what you want to do with the form data.
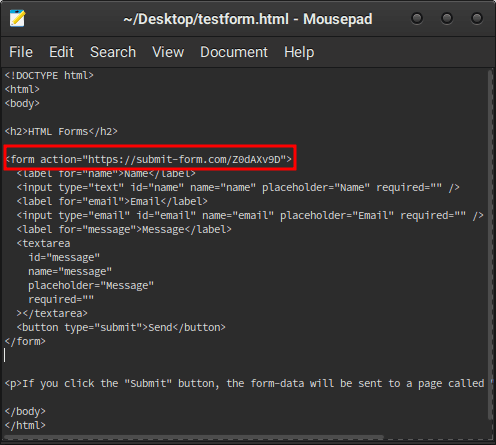
Now, you have configured the form backend. It is time to use it in your projects. Assuming that you have copied the action URL, you can simply use it in your HTML code. Or whatever framework you are using. I have an HTML form snippet, so I have just integrated it like this.
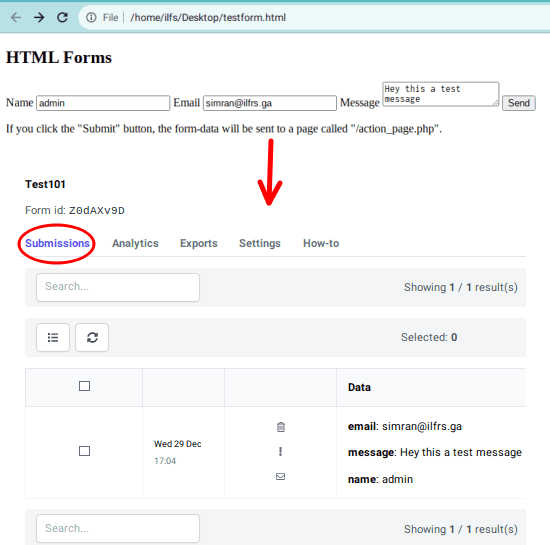
Host your form anywhere and when people start submitting data in it, you will receive the notifications. Alternatively, you can check the submitted data on the dashboard. And from the Formspark dashboard, you can even export to CSV if you want to.
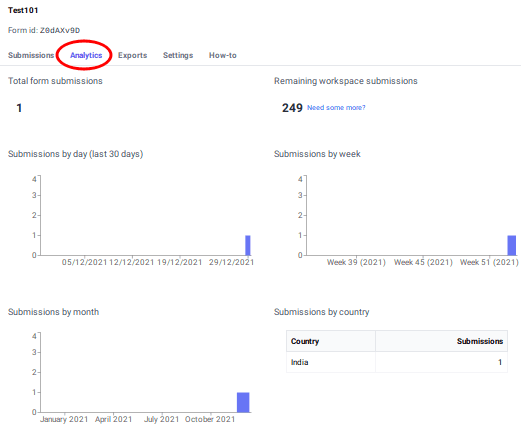
One cool feature of the form dashboard is the analytics. Here it shows you a graphical representation of the submissions that you have received so far. From the same interface, you can even track your free quota too.
In this way, you can use this powerful form backend for your projects. No matter what technology you are using, you will be able to integrate it with ease. The detailed documentation page will help you get started with it, and after that it is really simple to create endpoints for your forms and track the submitted data.
Final thoughts:
If you are looking for a simple and powerful forms’ backend system for personal or developer use, then Formspark is a very good option. I liked the fact that it includes an analytics dashboard, supports file uploads, ad webhook integration. It is perfect in every aspect and you can give it a try on your own and let me know what you think about it.