This tutorial explains how to online transcribe media files.
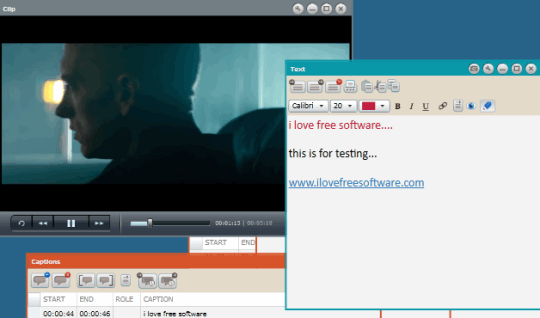
ClipFlair Studio is an online service that helps you to transcribe your media files online. You can open online videos (using the video URL) or can add audio/video file from PC for transcription. It supports mp4, mp3, wmv, and wma media files. Without any sign up process, you can use its built-in text editor and media player for transcribing your files. What makes it more beneficial is that multiple instances of its media player and text editor can be opened together.
There are many audio transcription software and video transcription software available, but all of them have to be installed on your PC. In case you want to transcribe a video file online, ClipFlair Studio will come handy.
How To Transcribe Audio Video Files Online With ClipFlair Studio?
These are the steps that will help you to transcribe media files using this service.
Step 1: Access its homepage using the link present at the end of this review. Make sure Microsoft Silverlight is also installed on your PC to open its homepage. If it is not installed, it will first let you install it on PC.
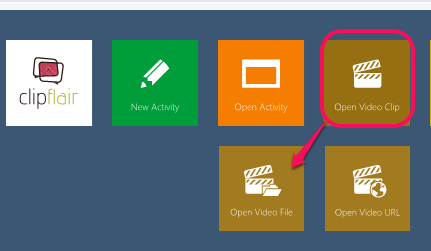
On its homepage, you need to click on Open Video Clip option. This will give you two options: Open Video File and Open Video URL. Click on Open Video File option to add a media file from PC. If you want to open an online streaming video file for transcription, click on “Open Video URL” button.
Step 2: Video file opens with its built-in media player. You can start playing that media file.
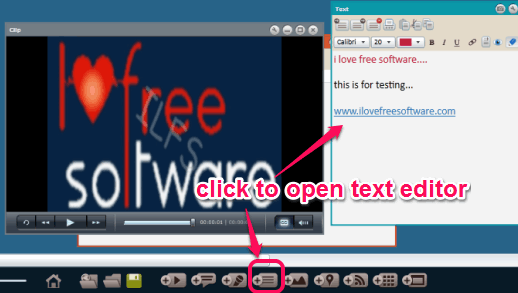
Step 3: Now use Add Text option. It will open the built-in text editor.
Start writing what you hear from your media file. You can also insert hyperlinks in text content. To make it more comfortable to write down text, you can change font style, color, and size. Once you have written the text, you can export it to PC as plain text format or in its native format.
Create Subtitles and Insert Own Audio To Your Media Files:
These are also other handy features of this online service.
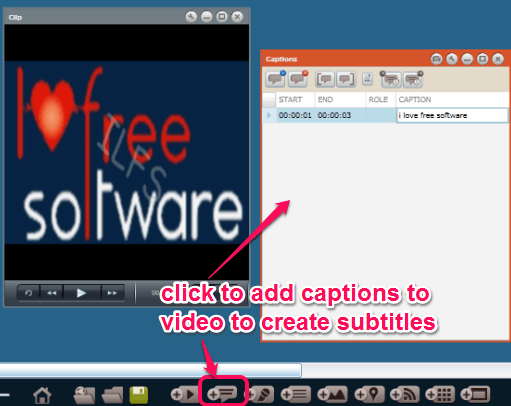
If you want, you can create your own subtitles for a particular video file. For this, you need to use Add Captions button. It will open Captions window. Now you can insert caption at particular position of video. You need to double-click on CAPTION box to insert text. All the captions can be saved as SRT, FAB, and TTS file.
Not only you can create subtitles, you can also add own voice in video. This is quite similar to Dubbing or revoicing. You can insert own voice (using microphone). Add Revoicing button is used for this. But this feature didn’t work for me which during testing. See if it works for you.
Conclusion:
ClipFlair Studio is quite an interesting service to transcribe audio and video files online. Of course, this is not the best option to use if you want to transcribe a big video file that is on your PC (as uploading would take a long time), but if you want to transcribe some online streaming video, then this is a pretty good option.


