Canva Automation is a Google Chrome Extension that can be used to easily automate Canva Designs that contain variables and generate multiple variants of the design in batches. You can then download the designs automatically to a specified folder. It works like a helper bot for print-on-demand designs.
Canva Automation is identical to Mail merge that lets you generate and email a batch of documents that are personalized for each recipient by name using a data source such as an Excel spreadsheet, or a database. It is a very handy tool for designers who use Print on Demand (POD) platforms such as Merch (Amazon), Etsy, Shopify and more. It can also be extremely beneficial for marketers and social media influencers who may require generating scalable graphics for the various platforms that they use.
The following are the Basic Steps that are involved in Canva Automation:
- Create a generic design on Canva by using an existing template or create the design from scratch.
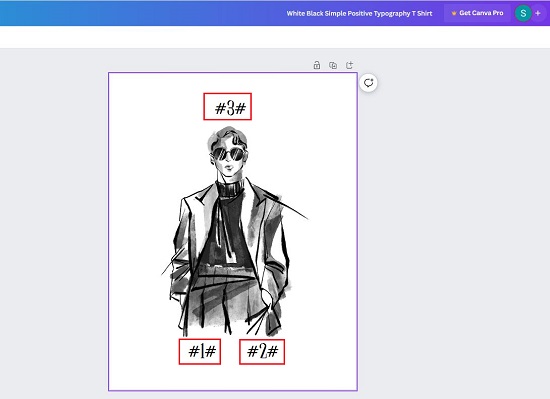
- Marks the content variables in the design with #1#, #2#, #3# etc.
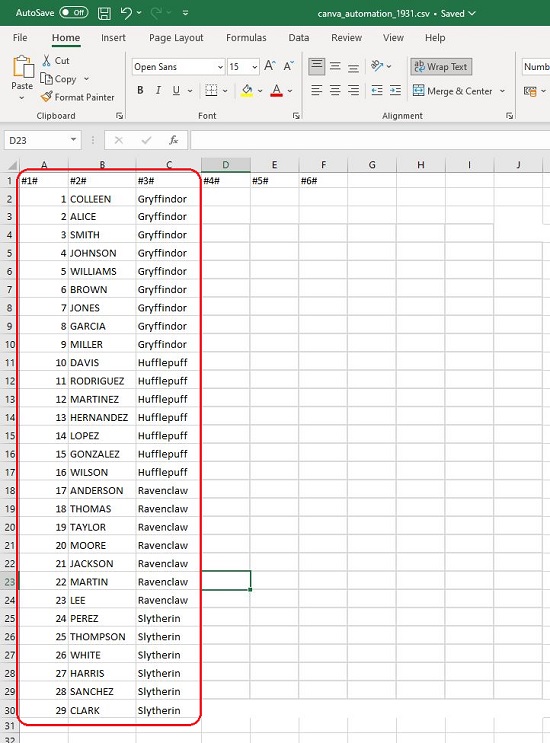
- Create your CSV file that will act as the data source for the content variables
- Select the file type for download once the designs start getting automatically generated such as JPG, PNG, PDG, SVG, MP4 and more.
- Launch the automatic design generation process and the data values from the CSV file will be sequentially used in place of the respective content variables as the designs are being generated and downloaded.
The Free version of Canva Automation allows you to automate the creation of 10 designs. To remove this limitation and create unlimited designs, you can subscribe to their paid plans. Click here to read more about the Pricing.
How it Works:
1. Download and install the Chrome extension for Canva Automation by using the link that we have specified at the end of this article.
2. Navigate and sign in to your Canva Account and use an existing template or start designing from scratch. In our case, we have used a T-shirt design to try out the product.
3. At a desired and suitable location in your design, marks the variables as #1#, #2# etc. The variables will be replaced with the data values from the CSV file.
4. Prepare your CSV file (as shown in the screenshot) that will act as the data source. You can also download a sample CSV file from using the Extension and use that as a template.
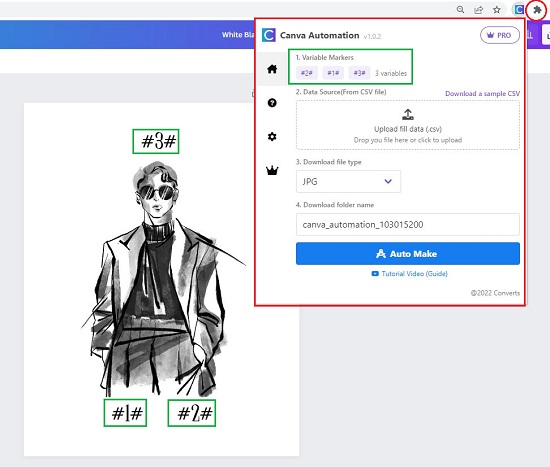
5. Launch the Extension by clicking on the ‘Extensions’ icon to the right of the address bar and verify that Canva Automaton has correctly identified all the content variables (under Variable Markers) that you have described in your design.
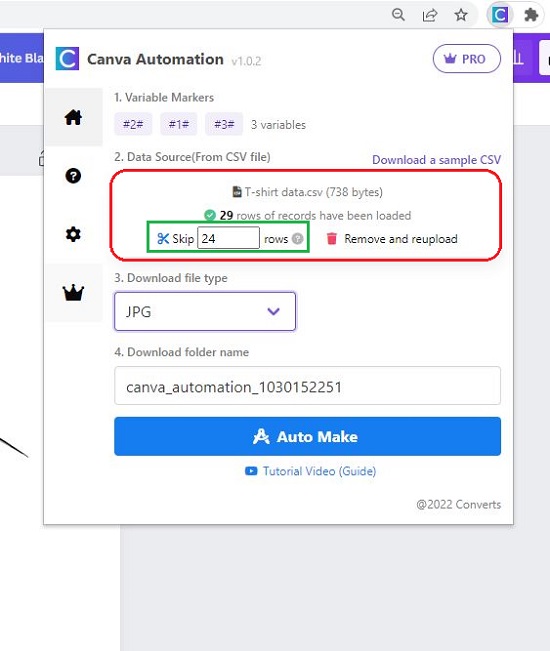
6. Drag and drop the CSV file in the box that has been provided. You can choose to skip a certain number of rows using the checkbox. This is important if you are re-using the same CSV and wish to skip the number of the last completed downloads so that you need not frequently modify the CSV file.
7. Select the download file type using the drop-down list from the available choices and specify the name of the Download Folder.
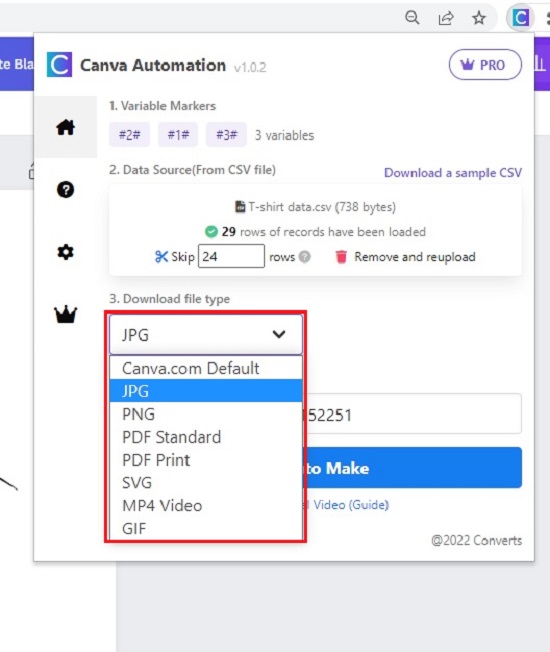
8. Verify that you have performed all the above steps correctly and then click on ‘Auto Make’.
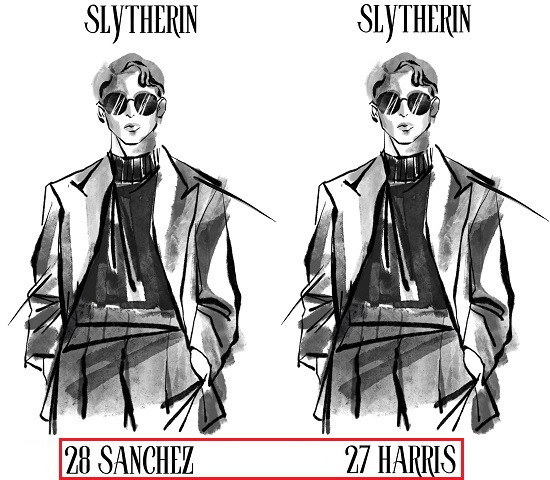
9. Canva Automation will now replace the content variables with the data from the CSV file, automatically generate the designs and save them one by one in the specified folder in the file format that you have selected.
Closing Comments:
Canva Automation is a great tool for batch designing on Canva platform using multiple variants. It’s a great boon for users of POD platforms since the entire process of designing can be easily automated without any manual intervention.
Click here to download navigate to Canva Automation and download the Chrome Extension.