Update 2022: This website no longer exists now. We recommend you to try some other alternative instead.
This tutorial explains how to schedule meetings using Gmail.
Although Gmail doesn’t have the native feature to schedule meetings, but it is possible with the help of a website, named Timesuit. This website works with its Google Chrome extension in Gmail and lets you schedule meetings directly from the compose window of Gmail.
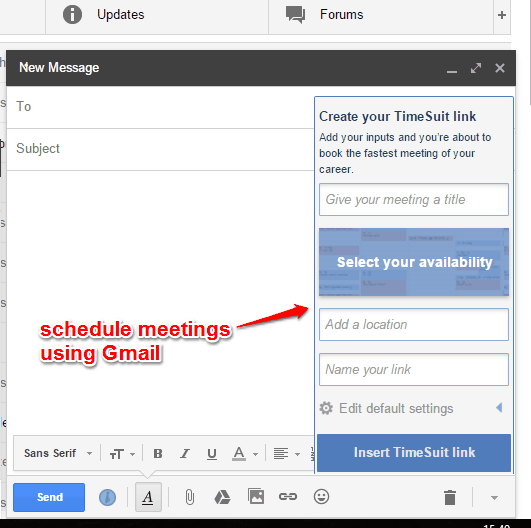
You will be able to add meeting title, set your available times for the meeting, meeting location, and finally add a link with a custom name that will contain all these details and send the email.
Receivers can access that link to fill the times that suit them most. The best part is that receivers don’t need to sign up or install the extension. When each individual recipient has responded you, you can get the meeting overview to select the most appropriate time for the meeting, and invite users for the selected date to attend the meeting.
The screenshot above shows the pop-up of its Chrome extension (in Compose Mail window of Gmail) using which you can fill meeting details and send the email.
How To Schedule Meetings using Gmail?
Here are those important steps that will guide you to schedule meetings using Gmail with the help of this website:
Step 1: Create your free account using Add to Gmail button. It will first prompt you to login to your Gmail account to connect with this website and then fill further details to complete the sign-up.
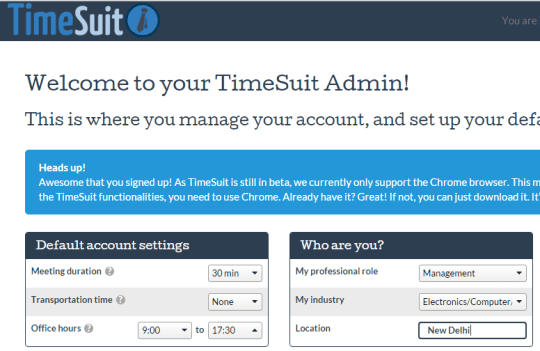
Step 2: When you have completed the first step, you will come to the admin section of your Timesuit account. Here, you can set your default account settings, like Meeting duration, Office hours, etc., and information related to you (like your location, industry, etc.). You can change these details anytime.
Step 3: Now you need to install the Chrome extension of Timesuit. After installing the add-on, it will refresh your Gmail account tab or you might need to refresh it manually.
Step 4: Open Compose window and you will notice that Timesuit icon is added at the bottom left. Clicking on that icon will open the pop-up where you will find all the options that you can fill for your meeting.
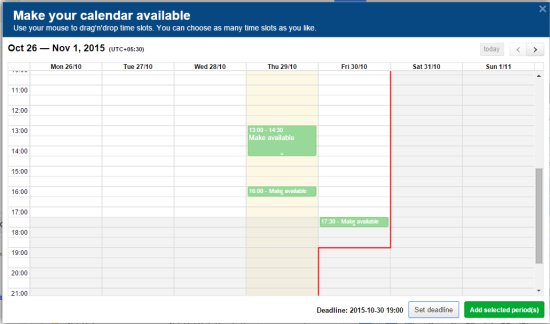
You can click on Select your availability option to open the Calendar and fill the time slots when you will be available for the meeting.
Fill the other details and click on Insert TimeSuit Link button. Finally, you can send the email to recipients.
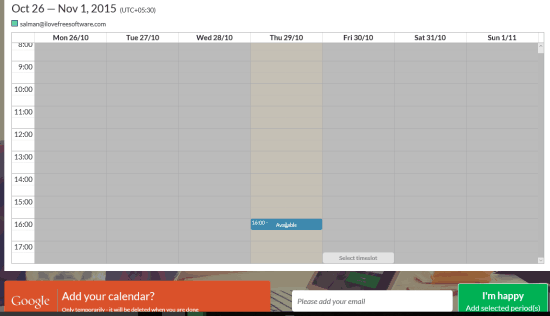
Step 5: When a receiver will click the meeting link, he/she can select all or the time slots that suit him/her.
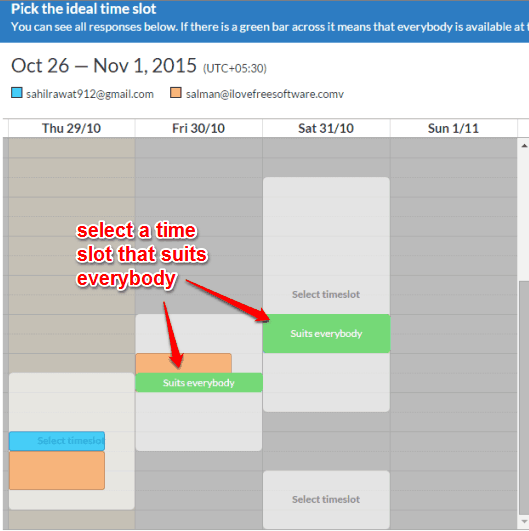
Step 6: You will receive the email alerts for each individual response. When everyone has responded, go to the meeting overview page to check the time slots that suit everyone for the meeting.
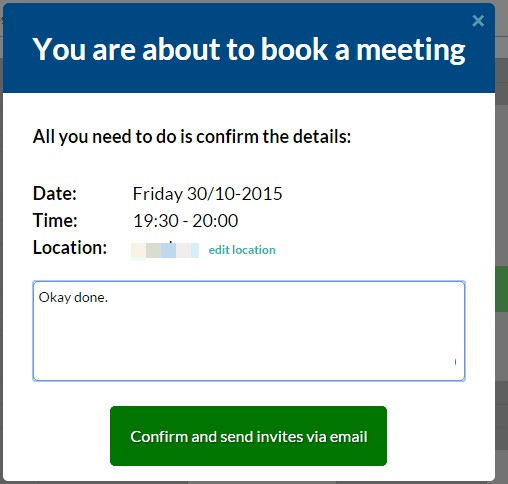
You can select a particular time slot to schedule the meeting by sending the email.
Conclusion:
You can find plenty of free online meeting schedulers, but this is one of the easy ways to arrange a meeting. Your Gmail account and Chrome browser are the two things that you need and then you can schedule meetings directly from Gmail.
