Here is a free Screen Recorder software that comes with mouse cursor tracker. That means you can record the screen that comes under mouse cursor range or area defined by you. You will have the option to set the size of recording area that will be covered under the mouse cursor. So wherever your mouse cursor goes, that particular area will automatically be set for recording. You also don’t have to interrupt recording for this purpose.
Apart from this unique feature, this free screen recorder lets you record a particular window, full screen, a fixed along with sound (microphone, speakers, etc.), which you find in other similar screen recording software.
Before recording the screen, you can also enable mouse cursor highlight (adds a circle around the mouse cursor), set a custom text watermark, video compressor and fps, etc. So, some really good features are there, which make it a fantastic screen recorder. The only thing you might not like is that the output is saved in AVI format only.
Above you can see a quick recording with mouse cursor tracker and cursor highlight made by me using this software.
Using This Free Screen Recorder Software:
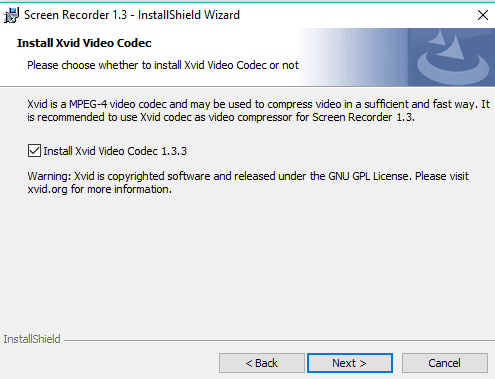
Here is the link to download the setup of this screen recorder. During the installation, you can also choose whether you should install Xvid Video Codec (used to compress video) or not.
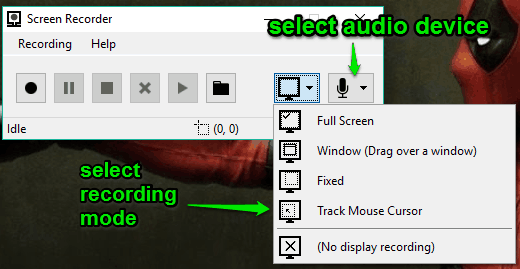
After completing the installation, you can open its simple interface, which is self-explanatory. There are Start, Stop, Pause, and Cancel buttons for recording purpose. Apart from that, you can select the screen recording mode:
- Full Screen
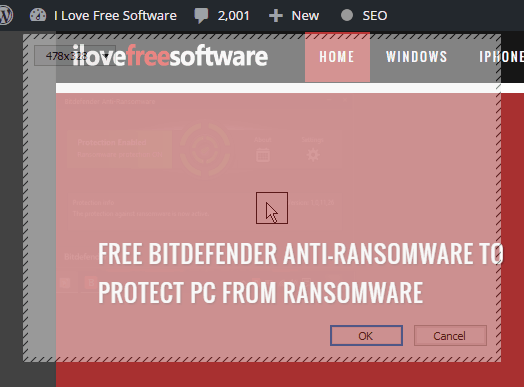
- Track Mouse Cursor: After selecting this option, a transparent window will be in front of you. You can also see the screenshot below for reference. Using that window, you can set the size that will be used as recording area covered by the mouse cursor.

- Record a Window: You need to press n hold this option using the mouse cursor and then drop the cursor to a window. After this, that window will be selected for recording. Do not close or minimize the window. Otherwise, the recording will be interrupted and you need to start from the beginning.

Just next to this, you will find the option to set audio source if you need to add sound to your screen recording.
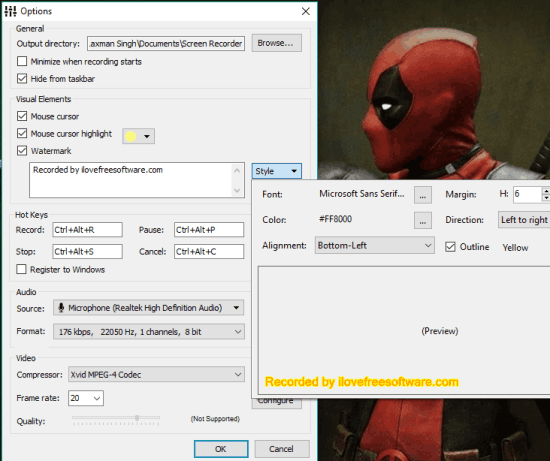
Now when you are done with all this, you should customize Options (available under Recording menu). This is handy to set the output location for recording, set text watermark with any font, size, color, set video compressor option, enable mouse cursor highlight (with custom color), frames, etc.
Customize and save settings.
Now you can record desktop with any mode you want.
The Verdict:
This has become one of my favorite screen recording software. Although I prefer software that can record screen in GIF (as it is related to my work), but I can wholeheartedly recommend this screen recorder to you guys. Some really fantastic features are included in this software.

