This is simple but handy Windows 8 tutorial, that can help you customize Win+X menu in Windows 8. Most of Windows 8 users don’t usually use Win+X keys, but it is quite useful and can really improve your working speed and efficiency.
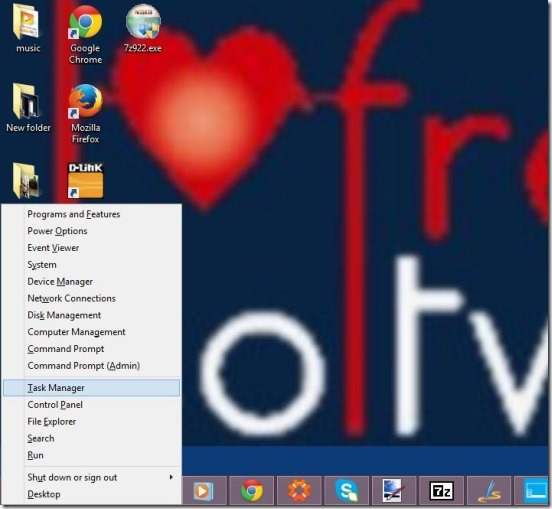
Microsoft came up with the Win+X menu, also called as the Power Menu. This menu can be opened by simply pressing Win+X or right-click on bottom left corner of the screen. You’ll see a list of shortcuts for multiple important tasks. To name some include: Run, Search, File Explorer, Task Manager, Control Panel, Command Prompt, Computer Management, Device manager, Disk Management etc. Each of these are grouped under their own group, based on their respective functions. But to most of the users, they don’t actually need all the mentioned items(tasks) on regular basis.
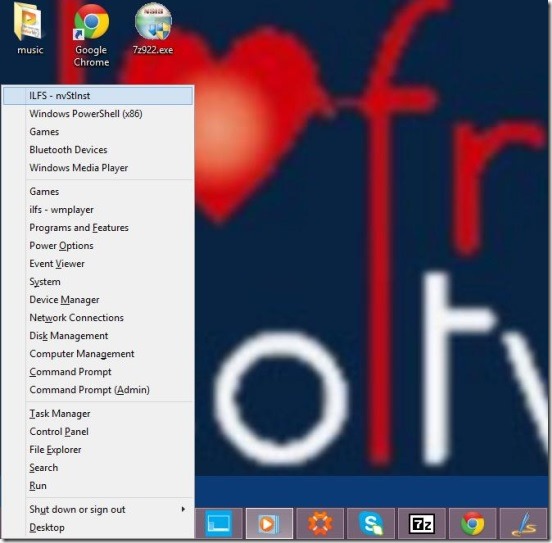
Let’s customize Win+X menu to suit it as per our liking.
In this Windows 8 tutorial I am going to use a very good Windows 8 customizing desktop app: Win+X Menu Editor. The download link is given at the end of this Windows 8 tutorial.
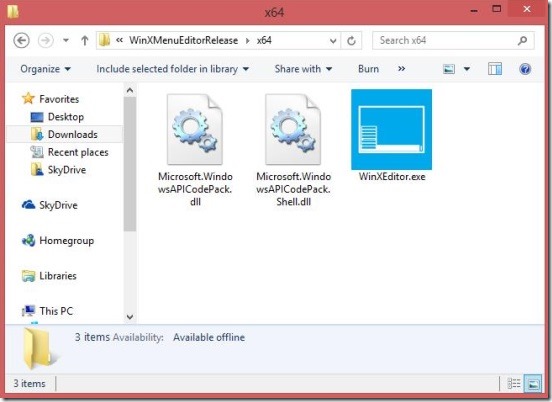
This little Windows 8 tweaking app is lightweight and of course handy. Good thing is, it is portable and doesn’t needs any installation. So simply get it to the Windows 8 device and run it to customize Win+X menu. The app gives you two options for the exe files: x64 and x86.
Customize Win+X menu by following steps of this Windows 8 tutorial:
- Simply launch the app as per your system type.
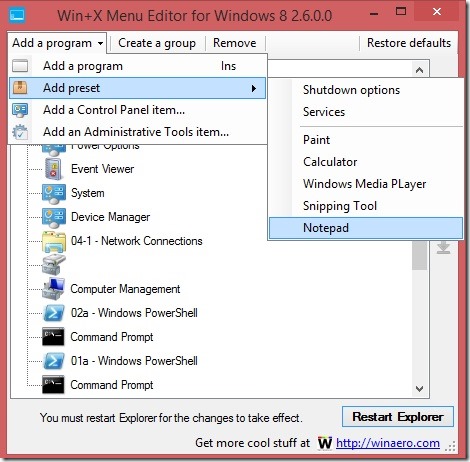
- Click on Create a group to add new group in the Win+X menu list (or skip this step if not required).
- Then do any of the following as per the requirements:
- Click on Add a Program button in top menu bar, and click on Add a program list item again, you’ll get a file browser, simply browse and select desired exe file.
- Click on Add Preset, and select from a list of tasks that are by default added in the app’s list.
- Click on Add a Control Panel item to select desired control panel item.
- Click on Add an Administrative Tools item and select desired Admin tool items like: Defragment and optimize drives, Component service, Services, Resource monitor, and so on.
- Once you are done adding items, now to remove items, simply select desired item and click on Remove button. You can also remove an entire group the same way.
- After settling up with everything simply click on Restart Explorer button once, to make all the effects take place.
Final note:
That was all about this Windows 8 tutorial. Simply follow the steps and customize Win+X menu your way. However, the app does lacks the Reset button. The app makes it quite intuitive to customize the Win+X Menu. It’s easy, fast, functional. Simply download the app, run it, and customize Win+X menu.
Eager to check more good Windows 8 customizing tips and tricks, then check out the followings:
Remove Start Button From Task Bar In Windows 8.1.
Change Display Language In Windows 8.
Disable Ribbon UI In Windows 8 File Explorer Using Resource Hacker.


