This tutorial explains how to record desktop screen using VLC media player.
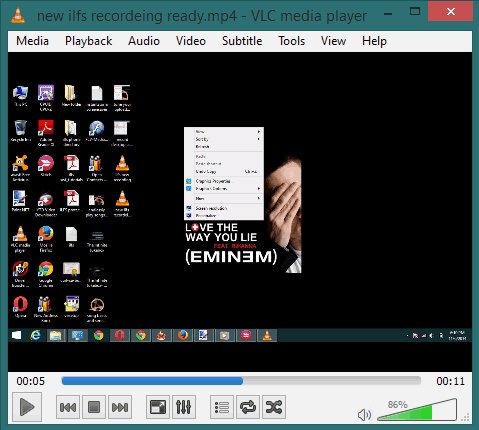
VLC Media Player is one of the best media players and provides a lot of interesting features. Among those features, recording the desktop screen is quite valuable. Using this feature, you can record full desktop screen using VLC, and save it in mp4 format. Recording preview can also be viewed directly in VLC player.
Although a lot of good screen recorders are available over the web, but this feature is beneficial when you don’t have any standalone screen recorder, or need a straightforward way to record your desktop.
You may also check these free VLC plugins covered by us: Syncplay, Playlist Cleaner, and YouTube playlist extension for VLC.
How To Record Desktop Screen using VLC Media Player?
Here are the simple steps to start recording the desktop screen using VLC player:
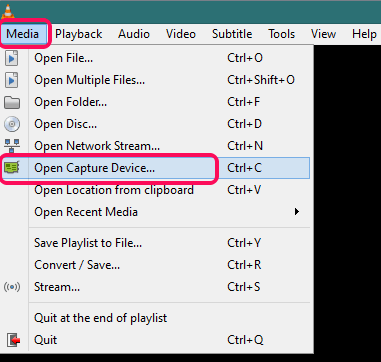
Step 1: Open your VLC player and access Media menu. In this menu, you need to tap on “Open Capture Device” option. It will open an Open Media window in front of you.
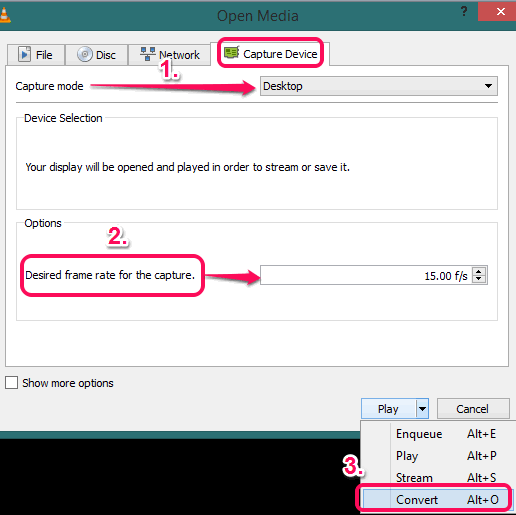
Step 2: In Open Media window, go to Capture Device tab. After this, choose capture mode as Desktop. Once you are done with this, set the frame rate for recording the screen. It would be good to set it as 15.00 f/s.
Step 3: In this step, you have to select Convert option using the available drop down menu, as highlighted in the above screenshot. This will open Convert window.
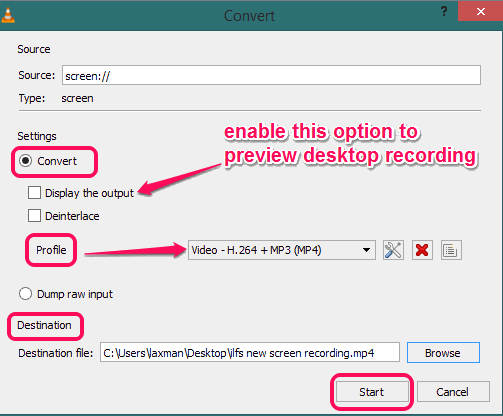
Step 4: In the Convert window, select ‘Convert’ option present under Settings section and choose the output format profile as ‘Video -H.264 + MP3 (MP4)’. You can also enable ‘Display the Output‘ option if you want to preview screen recording in VLC player.
Note: You can also edit profile using Settings button to set video resolution, other output format, etc. But doing so might affect your screen recording, so I would recommend you to go with default settings for your profile.
Step 5: Set the destination location and click Start button.
Video recording will be started and you can minimize VLC player to record all your desktop activities.


