This tutorial discusses how to group Live Tiles in Windows 10. The introduction of Windows 8 marked the beginning of an entirely new and radically different UI design philosophy for the Windows line of Operating Systems. This saw the introduction of the (then) full screen running modern UI apps, created using the modern style (earlier known as metro) design language, seamlessly blended with the traditional Windows UI that everyone has come to know and love. And being Windows 8’s natural successor, Windows 10 plays with the modern style apps even more nicely.
Amongst the many unique features of modern UI apps, probably the mostly important are Live Tiles, that provide real-time information regarding just about anything (e.g. Weather, Breaking News), support desktop notifications, and can be easily resized.
But did you know that you can create groups of live tiles pinned to the Start Screen, to manage them even better? Sounds fun, right? Let’s see how you can organize live tiles in groups in Windows 10.

How To Organize Live Tiles In Groups In Windows 10?
Organizing live tiles pinned to the Windows 10 Start Screen in groups is easy, incredibly easy. Don’t believe me? Read through the following illustrative walkthrough, and you will:
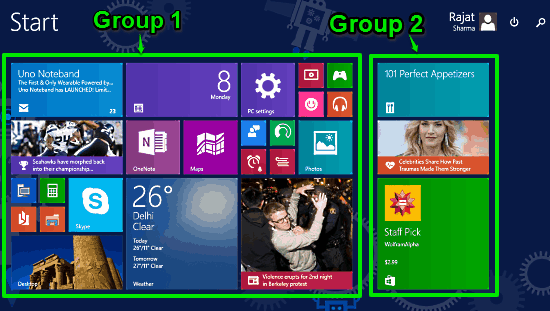
Step 1: Initially, the Windows 10 Start Screen includes two groups of live tiles, separated by a vertical space (although this layout may vary from one PC to another). The first group has a larger number of tiles, whereas the second has fewer tiles.

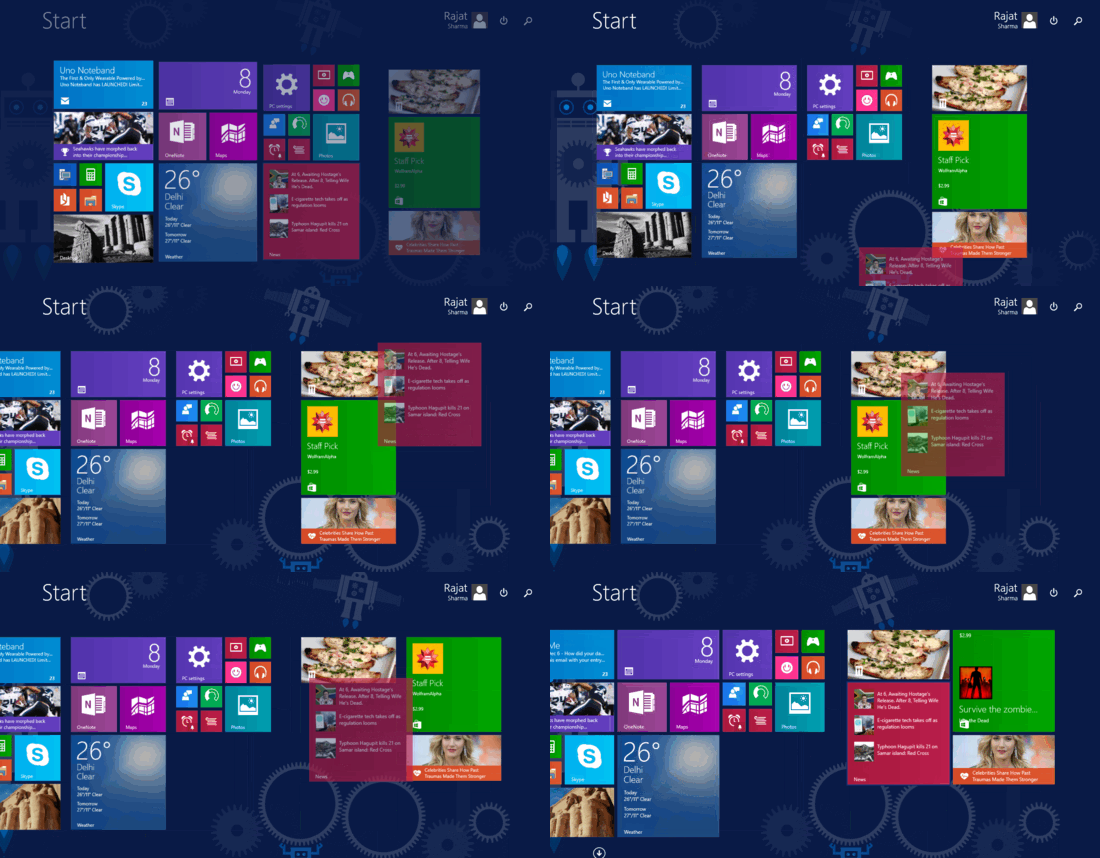
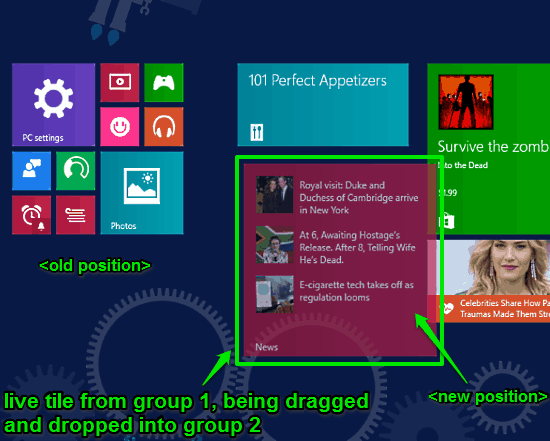
Step 2: Now, let’s say that you want to move a tile in Group 1 to Group 2. To do so, click and hold the mouse button on the live tile that you want to move, and drag it to the destination group. As you do so, the live tiles that are already in the destination group will automatically move with respect to the mouse pointer, in order to accommodate the new tile. Once you’ve decided where you want to place the live tile in the new group, simply release the mouse button. Here’s a screenshot:

That’s it. You can use the above method to move and rearrange all the other live tiles into different groups, as per your convenience and/or taste. Yay for even more customizable Start Screens!
Related: How To Directly Boot To Start Screen In Windows 10?
Wrapping Things Up
I’ve said it before, and I’m saying it again, Windows 10 is one of the most customizable Operating Systems ever. And the modern UI elements such as the Start Screen, Live Tiles etc. are what make it so. And the fact that you can organize live tiles pinned to the Start Screen in groups takes the customizability to a whole new level. Do give it a try, you’ll be hooked.