This tutorial explains how to map OneDrive as network drive in Windows 10.
We know that OneDrive comes integrated with Windows 10. However, if you want to access your OneDrive contents on Windows 10 PC without reserving a space for it, then it is better to map OneDrive as network drive in Windows 10. When you have mapped it, you can also remove pre-installed OneDrive in Windows 10.
This tutorial covers those simple steps using which you can map OneDrive as network drive in Windows 10.
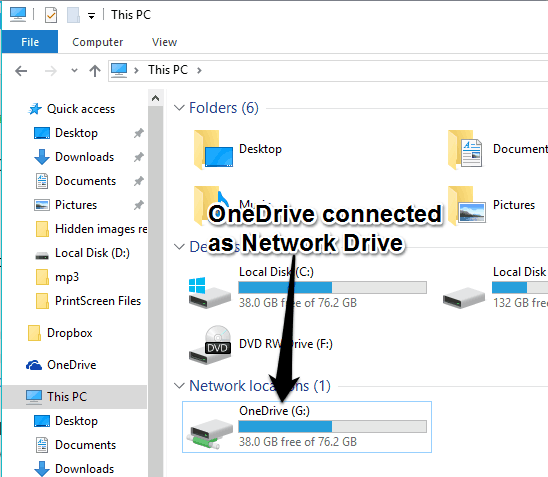
Below you can see OneDrive mapped by me as network drive in Windows 10.
How To Map OneDrive As Network Drive In Windows 10?
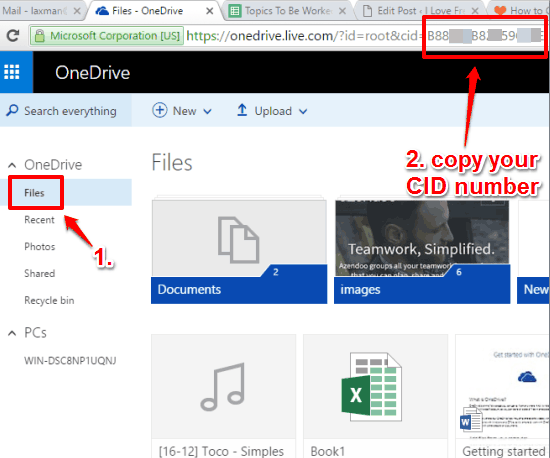
Step 1: First of all, you need to sign in to your OneDrive account on a web browser.
Step 2: After sign in, you need to click on Files section. Now you need to see your CID number on the address bar. You can see I have highlighted my CID number in the screenshot below. Select your CID number and copy it.
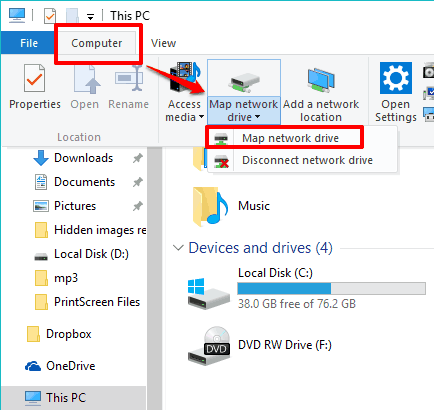
Step 3: Open File Explorer → access Computer menu → and click map network drive.
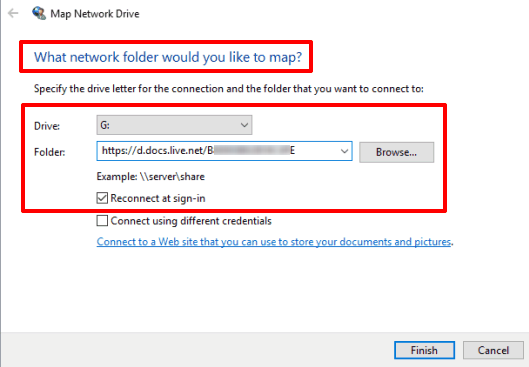
Step 4: Map Network Drive window will open. Now you can select a drive letter for OneDrive. In the folder path, you need to enter “https://d.docs.live.net/YourCIDNumber“.
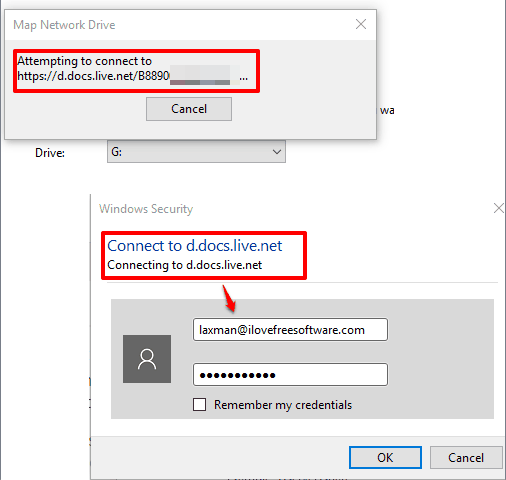
Step 5: Click Finish button and it will start the mapping process. During this process, Windows Security window will open. Using that window, you can enter your OneDrive credentials.
That’s it! You have successfully mapped OneDrive in Windows 10.
Conclusion:
Mapping the OneDrive is especially useful when you don’t want to open a web browser again and again just to access your OneDrive contents. Just map it as a network drive and you can access all OneDrive files directly from PC. You also don’t need to install OneDrive and reserve some space for it. Try it yourself.
You may also check:
