LightZone is a free image editing software which includes lots of filters to make your picture look better, apart from various editing tools. This is the perfect and free alternative to Adobe Lightroom. Like Adobe Lightroom, LightZone also includes a photo browser to find and organize pictures on your system. Additionally, the browser will provide you detailed information about the picture. A unique feature that LightZone includes, has to be the ability to save filters, effects stacked on one another. Unlike Adobe Lightroom’s ‘before and after’ perspective, you can see the difference between the edited and original version of a picture with a single click. LightZone is available on Windows, Linux and Mac.
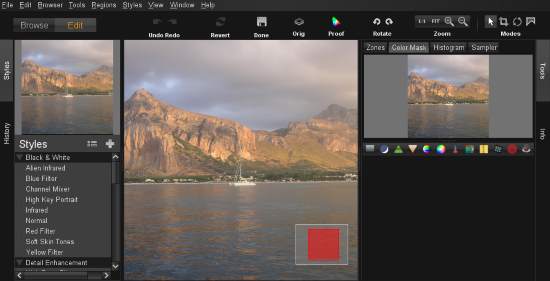
LightZone wouldn’t be useful if you’re looking to cut, copy, paste, select, etc parts of a picture. If you’re thinking of using a magic selection wand to select and edit parts of files, then let me tell you, LightZone is not a free Photoshop alternative. You can find software with that particular set of talents in this list.
Let’s see what LightZone offers.
How to Use LightZone to Beautify Pictures
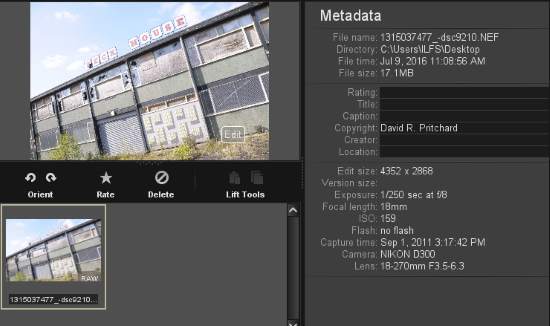
After launching LightZone, the first thing I did was to check the support for RAW image files. I tested NEF and RAW images. LightZone was able to open them perfectly. Since JPEG files are smaller, let’s use a JPEG sample instead to reduce the processing time.
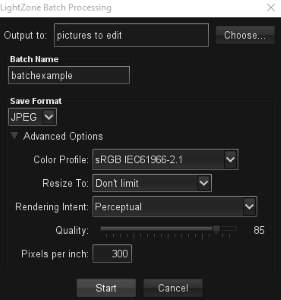
The browser will show you various locations on your system from which you can import images. On right, you can view metadata of the pictures, which includes the camera with which they were shot. Few metadata fields can be edited as well. The best thing about the browser has to be the batch conversion tool. However, it can convert various images only into TIFF and JPEG. Batch image filtering is also available as you can select a specific ‘Style’ and apply it on selected photos.
Let’s take an example to illustrate this Adobe Lightroom alternative better. I have an image of a beautiful woman which I will make ‘crisp and classic’. So to start, I’ll first have to check if the profile is good enough or it needs a bit of cropping to enhance the subject. Cropping, rotation, zooming can be done from the top right. Since the sample is perfect, no need to crop.
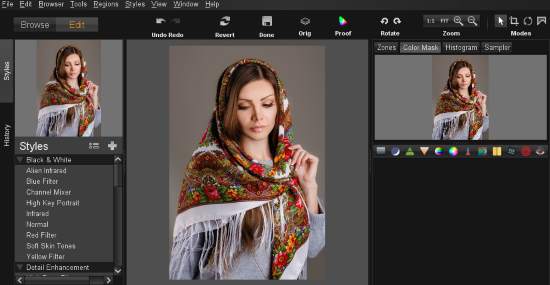
The picture can be analyzed through Zones, Histogram, Color Mask and Sampler profiles on the right. Below that, are various tools to edit the image such as Gaussian Blur, Sharpen, Re-Light, etc. Selecting a tool doesn’t replace the settings like in most photo editors. The settings stack up so you can toggle multiple characteristics at the same time.
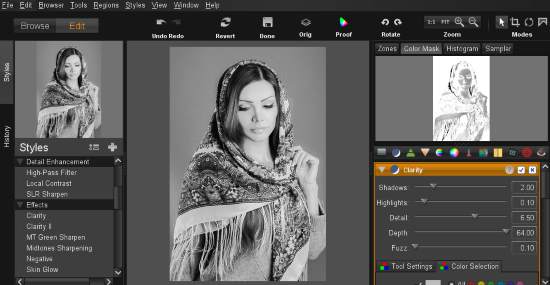
I used Re-Light to make the image stand out more. I made sure to Re-Light the image in a healthy dose. Or else, the image might become too grainy. If the image becomes too grainy, it can be adjusted with Noise Reduction. To give it a classy look, I used the Infrared filter under Black and White in the Styles panel. I also used Clarity in Effects. Hence, with two tools and two filters, I edited an unprocessed picture to look quite good. Click on Save As to save the edited picture. You can preview the difference between the original and edited by holding ‘Orig’ on the menu.
This is the original picture:

This is the edited one:

Conclusion
LightZone is a really awesome tool to give your images awesome touch-ups. This photo editor does miss some necessary features such as Vignette, frames, straightener, mirror, etc. LightZone worked perfectly on my Windows 10 with a normal environment and did not show any bugs or errors. I award this tool 4.8 stars.
Download LightZone.