U Webinar is a free webinar software with various useful features like live presentations, webinar recording, schedule broadcasts, etc. Using this software, you will be able to conduct webinars and give live presentations. Similar to some of the other presentation services, you can easily present slides (like PowerPoint files) and images (like JPEG, PNG, etc.) with this software. Apart from that, it also allows you to present your webcam, desktop screen, and a whiteboard during webinar sessions. You can also record and schedule webinars with ease.
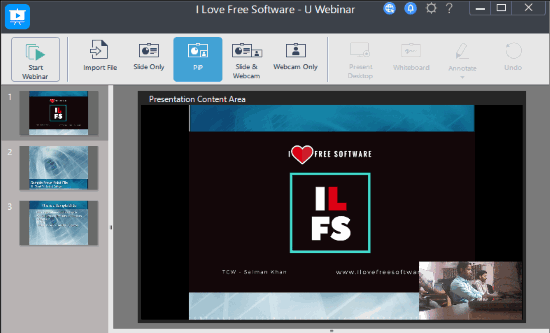
It lets you invite multiple participants and then present whatever you need in front of them. You can also use the “Text Chat” feature to communicate with the participants by sending and receiving text messages. Another interesting feature of this free webinar software is that it allows you to present both the slide and webcam at the same time.
Note: The free version of U Webinar is limited to a maximum of 25 participants, 60 minutes per presentation, and 2GB cloud storage.
How to do Presentations using this Free Webinar Software:
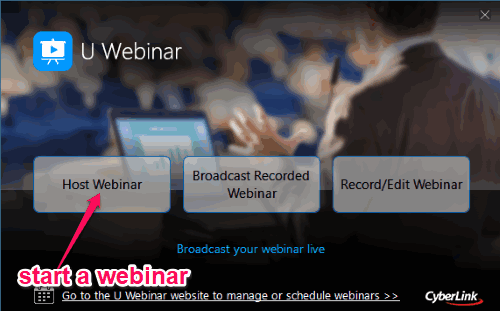
To get started, simply download and install “U Webinar” on your PC. Then open it up and then you will see three different options named, Host Webinar, Broadcast Recorded Webinar, Record/Edit Webinar. Now, simply click on the “Host Webinar” option to proceed and start a new webinar.
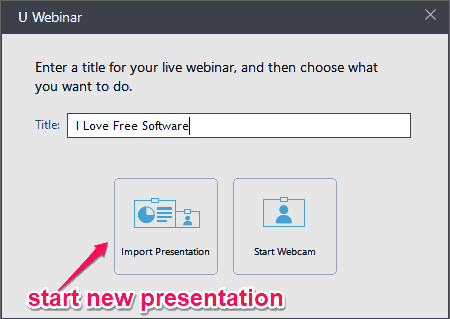
As soon as you do that, a new popup window will appear where you would need to click on “New Webinar” and then give a name to the webinar. There you will also see the options to import a slide or start webcam for the presentation. Once you choose any of these modes, the webinar window will appear where you can start your presentation. You can later toggle between these presentation modes during a session.
How to Invite Participants to a Webinar:
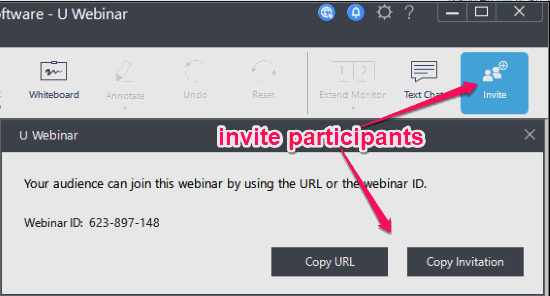
After you start a presentation, the first thing you would need to do is invite participants. For this, simply click on the “Invite” button on the top right corner. After that, you can either send invitations by sharing a unique URL or using the webinar ID. The participants can use either of them to join your webinar.
How to Present Slides using U Webinar:
Let’s say, you have selected the “Import Presentation” option then it will ask you to import a slide (PPT or images) for the presentation. You can import various files including PPT, PPTX, JPEG, JPG, PNG, and BMP. When you do that, the slides will appear on the webinar window, as shown below.
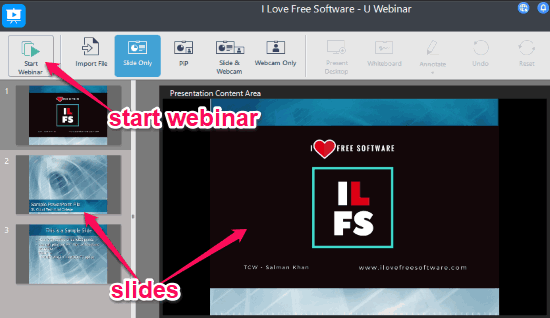
Now, to start the presentation all you gotta do is click on the “Start Webinar” button visible at the top left corner. As soon as you do that, the webinar session will start and you will be able to present the slides with the participants. All the slides will be visible on the left panel from where you can jump to any PPT slide or image.
How to Present Webcam using U Webinar:
If you want to say something or show something to the participants, then you can go ahead and present your webcam to others. To do this, simply click on the “Webcam Only” button at the top during a presentation or before starting a presentation.
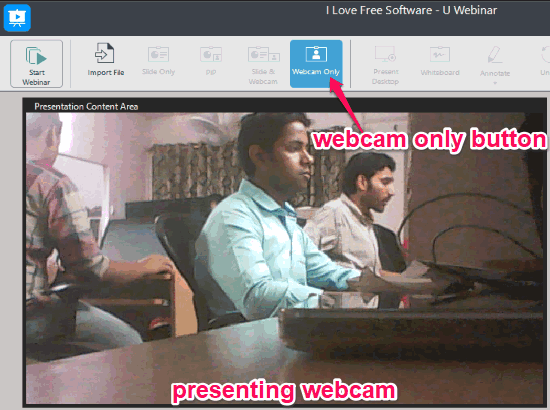
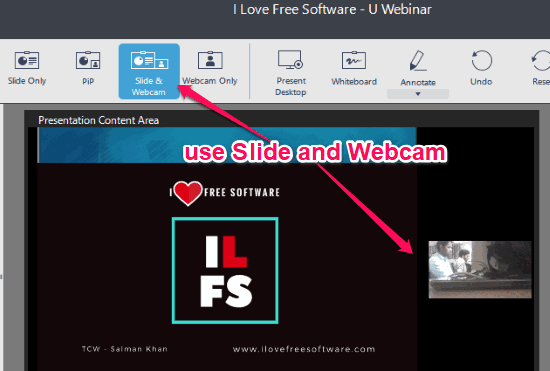
As soon as you do that, your webcam will appear in the presentation content area and the slides will hide. But, if you would like to present both the webcam and slides at the same time, then you can click on the “PiP” or “Slide & Webcam” button at the top. Selecting “PiP” will show your webcam at the bottom right corner of the slides. Whereas, selecting the “Slide & Webcam” button will divide the presentation area into two parts.
How to Present Desktop Screen using U Webinar:
If you would like to present something from your desktop screen, then this free webinar software also allows you to do that. For this, you would need to click on the “Present Desktop” button after starting a presentation.
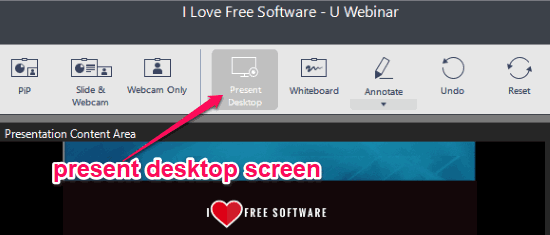
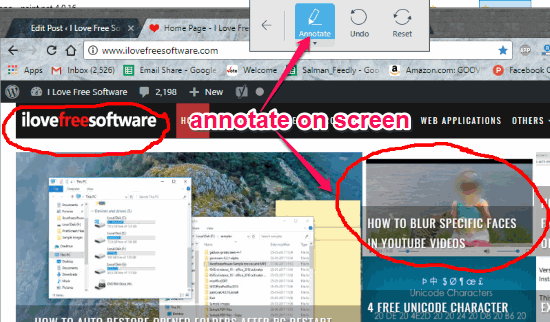
As soon as you do that, the screen sharing will start and you can present all the activities on your desktop screen to the participants. You can also annotate on the screen using a simple drawing tool. The drawing tool can be accessed by clicking on the “Annotate” option which will be visible at the top once you start presenting the desktop screen. You can change the color and size of the drawing tool manually.
How to Present a Whiteboard with this Webinar Software:
Another interesting feature of U Webinar is the “Whiteboard”. After starting a presentation, you will be able to present a whiteboard to draw and explain ideas to the participants. To use this feature during a webinar, simply click on the “Whiteboard” button at the top of the webinar window.
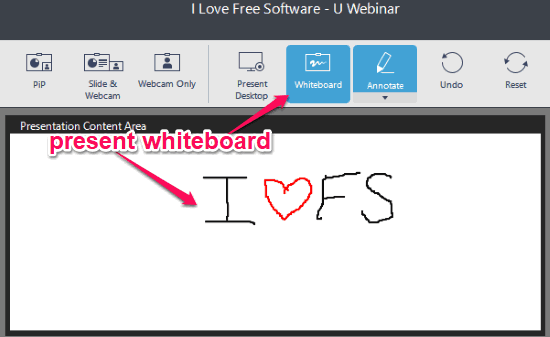
Once you do that, a blank whiteboard will appear in the presentation content area. You can then start drawing on the whiteboard to explain anything you want to the participants. The drawing tool for the whiteboard is same as the annotation tool and you can change the color and size of the brush manually.
How to Record Presentations using U Webinar:
One of the unique features of this free webinar software is the option to record presentations. To record a webinar, the first thing you would need to do is select the “Record/Edit Webinar” options instead of “Host Webinar” after opening this software.
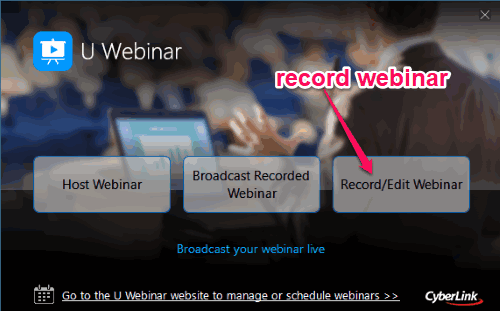
After you do that, simply click on the “Record New Webinar” button to proceed. As soon as you do that, you will be able to proceed in the same manner as you can host a webinar. But, do note that, recording a webinar is not live which means you cannot invite participants while recording a webinar. Actually, this feature is used to record a presentation and then directly play it while hosting a new webinar with the participants instead of presenting everything in real-time.

How to Schedule Webinars for Later:
You can also schedule webinars for later use. To schedule a webinar, you would need to go to the homepage of “U Webinar” and access your account. There you will see a “Schedule Webinar” button under the “My Webinars” section which you need to click to proceed.
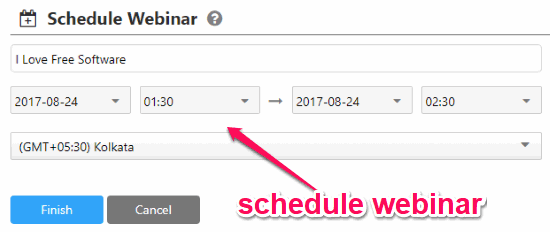
When you do that, you will be able to schedule a webinar by entering the presentation name, start date & time, end date & time, and selecting the time zone. Once done, you can add this event to Outlook and Google Calendar to get a reminder.
Closing Words:
U Webinar is no doubt one of the best free webinar software for Windows. It makes it very easy for you to present slides, images, desktop screen, etc. to others. Personally, I like it as it comes with a simple and intuitive interface making it much easier to use.