Here is a Windows 10 tutorial that explains how to schedule Quiet Hours. Earlier, Windows 10 came with a feature to turn on and off Quiet Hours manually but there was no option to set custom time to turn on and off Quiet Hours automatically. Thankfully, now it is possible to select start and end times for Quiet Hours. Windows 10 will automatically enable Quiet Hours and then stop it based on the time set by you. When Quiet Hours are active, you won’t receive desktop notifications for apps (depending on the settings set by you) while giving the presentation, playing games, or doing some other work in your Windows 10 PC.
To schedule Quiet Hours in Windows 10, you need to access System menu under Settings and go to Quiet Hours page. There you will see a new option to set start and end time for Quiet Hours. Before following the steps, do note the feature to schedule Quiet Hours has come with 17074 preview build. That simply means you can use this feature only when you are using preview build 17074 of Windows 10. Or else, if you want to get this feature without installing the preview build, then you need to wait for the next stable version of Windows 10.
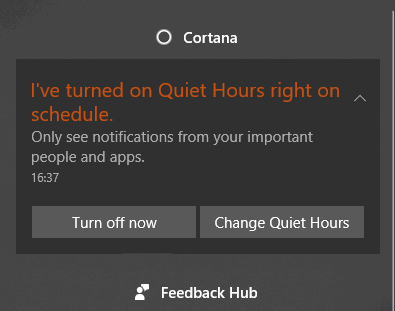
Above you can see a notification in Action Center that Quiet Hours turned on automatically on schedule.
How To Schedule Quiet Hours In Windows 10?
Step 1: First of all, click the Start button and select Settings icon. It will open Settings for Windows 10. You can also press shortcut “Windows logo key + I” to open Settings.
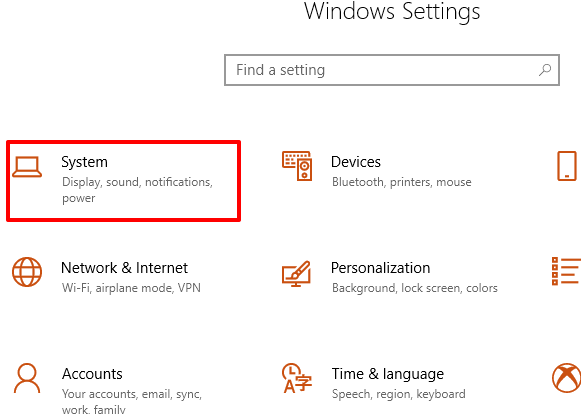
Step 2: Settings window has “System” menu. Select that menu.
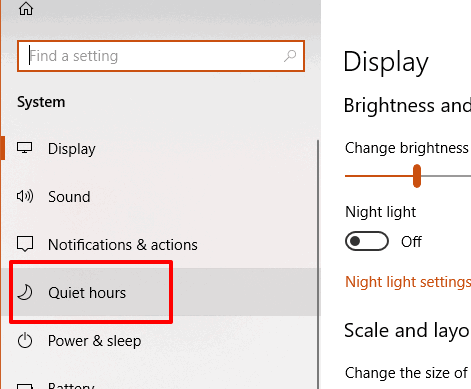
Step 3: In System menu, you will see a new “Quiet Hours” page. Press that option. If you are using Windows 10 Fall Creators Update or Anniversary Update, then you won’t see this option.
Step 4: In Quiet Hours page, you will see “Automatic rules” section. There is “During these times” option. Turn on this option and then click on it.
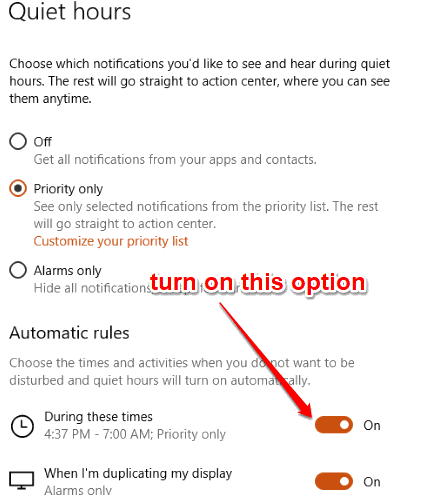
Step 5: Now you can set Start time and End time (in 24 hours format) for Quiet Hours. You can also set whether you want to repeat this timing daily, on weekends or weekdays. You can also set Quiet Hours to Priority only or Alarms only.
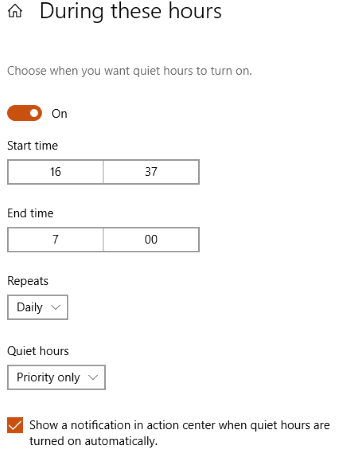
Adjust options and then close the Settings window.
The Quiet Hours will start on the time schedule by you and end automatically.
You may also try to restrict background data for WiFi and disable timeline feature in Windows 10.
The Conclusion:
This is a very important feature and people who use Quiet Hours in Windows 10 must be very happy with it. Instead of manually turning on and off Quiet Hours, we can simply set start and end times for Quiet Hours. If you can’t wait, then try this feature now and schedule Quiet Hours in Windows 10.