This tutorial will demonstrate how to add new frames to GIF with 5 free online GIF editors. These GIF editors allow you to easily add still images as frames to any GIF you want. Using these editors is very easy, as all you gotta do is open them up, choose the GIF and new frame image, and then these GIF editors can combine them together for you. After uploading the files, you can insert the new image in any frame position you want (like in the beginning, in between, or at the end) on the GIF. When you’re done with adding new frames to GIF, you can download it to your PC.
These GIF editors are completely free to use. They also offer some additional options using which you can resize the GIF, change GIF speed, add the number of loops, manually set the delay time, and do more. Instead of adding new frames, if you’re looking for a way to delete frames from GIF, then check out our post on 4 Free Websites to Delete Frames from GIF.

Now, lets get started.
Ezgif GIF Maker:
Ezgif GIF Maker is a free online GIF editor which you can use to add new frames to GIF. It allows you to easily add still images (up to 2000 images) as new frames to any GIF you want. The best part is that you can insert the new frames at the beginning of the GIF, in the end, or in between the GIF frames. You will also some useful options like resize, change time delay, etc.

How to Add New Frames to GIF using Ezgif GIF Maker:
Step 1: After you open this GIF editor, you will see the option to upload images. Now, what you need to do is select the GIF file along with the new frame images from PC and upload them. It supports various image formats like JPG, PNG, WebP, APNG, and more. The maximum file size limit is 6MB or 100 MB in total.

Step 2: When you’re done uploading the files, it will automatically show you all the GIF frames along with the new frame image that you want to add. You can now easily insert the new image into any frame position you want just by dragging it. You can also manually set the time delay, disable specific frames, resize, and do more.

Step 3: After that, you will also see some additional options using which you can toggle range of frames, add loop count, crossfade frames, etc. Once you’re all set, hit the “Make a GIF” button and then it will generate a new GIF that will contain the previous GIF frames and the new frame. You can then download it for free.
GIFMaker:
GIFMaker is another best free online GIF editor that can be used to add new frames to a GIF. Similar to “Ezgif GIF Maker”, this one also allows you to add up to 2000 images as new frames to any GIF you want. This GIF editor also lets you insert new frames anywhere you want like in between existing GIF frames, in the beginning, etc. Some additional options are also available to resize, add number of loops, change speed, and more.

How to Add New Frames to GIF with GIFMaker:
Step 1: To get started, visit the homepage of this GIF editor and then you will see the “Upload” option at the top. Now, what you need to do is choose the GIF file and the new frame image from your PC that you want to insert. It supports files like JPG, BMP, PNG, PSD, etc.
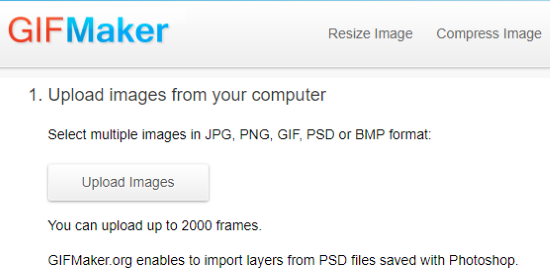
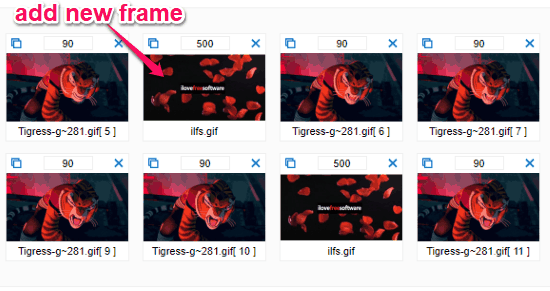
Step 2: After you have uploaded the files, it will automatically extract the frames from the GIF and also show the new frame image. You can then drag the new image to any position you want in between the GIF frames. It also lets you delete any frame you want or duplicate one, change the delay time manually, and also preview it.
Step 3: Not just that, it also provides other options using which you can easily change the animation speed of the resulting GIF, resize, add loops, optimize, etc. After you’re done with the settings, simply click the “Create Animation” button. Now, the GIF will be ready with the newly added frame and you can export it to PC.
MySpaceGens GIF Maker:
MySpaceGens GIF Maker is another useful GIF editor which can help you add new frames to GIF online for free. You can easily pick a GIF and then add up to 50 images as new frames. You can insert a frame in any frame position you want of the GIF. This one also lets you resize the GIF, change speed, and do more.

How to Use MySpaceGens GIF Maker to Add New Frames to GIF:
Step 1: When you open this GIF editor, you will see the option to upload GIF and new frames at the bottom. You can import almost all type of images like PNG, JPG, APNG, WebP, etc. from your PC.
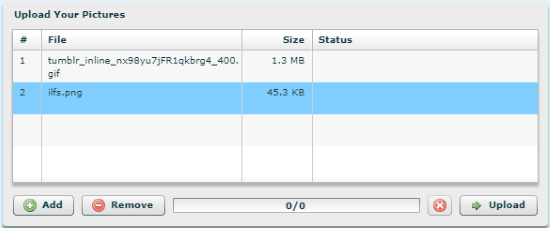
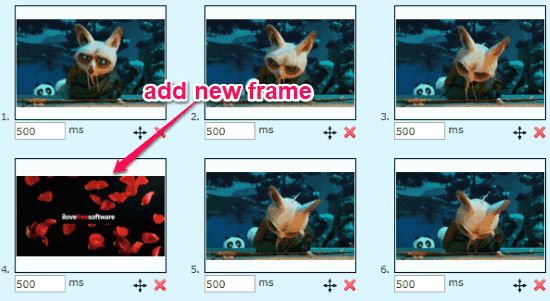
Step 2: Once you do that, it will automatically show you all the GIF frames and also the new images you want to add as frames. Now, you can easily position the new frames anywhere you want them to appear on the GIF. To do that, you can simply drag the frames to the appropriate position. Apart from that, you will also see the options to set delay time and remove specific frames.
Step 3: You can also manually resize the GIF and change the GIF playback speed. These options are available at the top. Once you’re done with adding new frames to the GIF, you can go ahead and click on the “Submit” button. This will generate the resulting GIF file which can be downloaded to your PC.
GifGear:
GifGear is also a simple and GIF editor using which you can easily add new frames to any GIF you want. This one also allows you to add still images as new frames to GIF. There is no limit on the number of frames that you can add to a GIF. You can add the frames anywhere you want in the GIF. It also comes with some additional option to resize the GIF, add transitions between frames, and more.

How to Add New Frames to GIF using GifGear:
Step 1: After opening this online GIF editor, you would need to upload the GIF file and the new frame image that you want to add. To do that, click on the “Add Pictures” button at the top left corner. You can also upload files by entering a URL. It supports various file formats like JPG, PNG, etc.
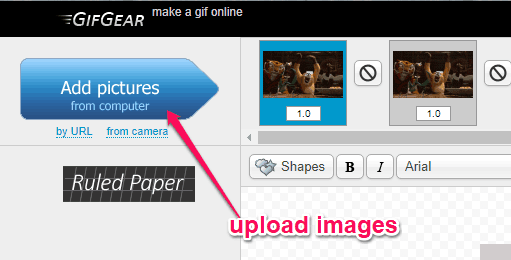
Step 2: As soon as the files are uploaded, it will automatically extract the frames from the GIF file and also the new images can be seen at the top. Now, you can move the new frame image to any frame number by dragging it. It also lets you manually set the frame duration in seconds.
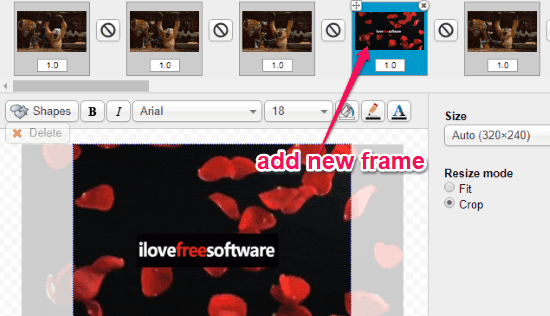
Step 3: Some other editing options are also available using which you can resize the GIF, add transitions between frames, add shapes, and more. After that, hit the “Done” button and it will generate the new GIF file that contains the new frame. You can also download it for free.
LunaPic:
LunaPic can also be used to add new frames to GIF. This online GIF editor enables you to pick any still images and then add them to an existing GIF as frames. This one also has no limit on the number of frames that you can add. You can insert the frame anywhere you want in between the GIF frames.

How to Add New Frames to GIF with LunaPic:
Step 1: After opening this website, simply upload the GIF to which you want to add the frame. This one allows you to upload any type of images like PNG, APNG, JPG, GIF, etc. You can upload the GIF from PC or entering a URL.
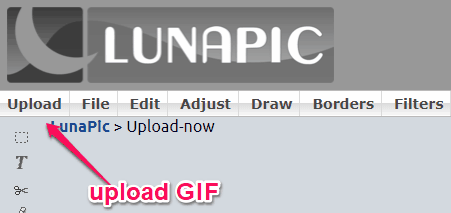
Step 2: Now, select the “Edit GIF Animation” option from the “Animation” menu. After that, you can see an “Add Animation Frame” option at the top of the uploaded GIF. Simply, click on this option and then upload the new frame image by pasting a URL or import from PC. While uploading the frame, you can set the delay time manually.
Step 3: Now, click on the “Animation Ordering/Edit Frames” option. As soon as you do that, it will show you all the GIF frames along with the new frame image. You can simply drag and position the new image to any frame number you want, delete specific frames etc.
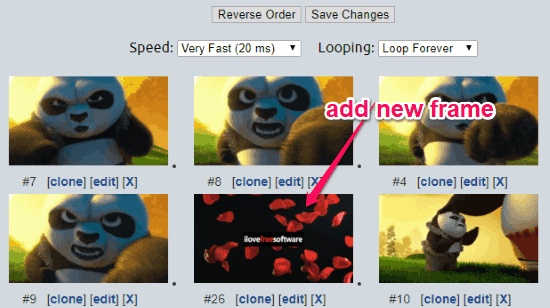
Step 4: You will also see the options to reverse frame order, change speed, add loops, and do more. Once you’re all set, click on the “Save” option at the bottom. Then it will generate the resulting GIF and allow you to save it on your PC.
Closing Words:
So, this is how you can now add new frames to GIF for free. These online GIF editors make it pretty simple for you to do that. All these editors come with an intuitive interface and can help you add frames to GIF in no time. Want to make your GIF more interesting by adding new frames, then start using any of the services explained in this post right away.
I hope you like this tutorial.