Here, are steps to capture date and time on photos taken from Android. Nowdays we use our phone cameras to click pictures. Phone cameras are convinient as you carry them with you all the time. Sometimes it happens that we take photos from our Android camera but we forget the date the photo was clicked. And if we forget the date then we are unable to recall the event it was connected with. Also, I couldn’t find an option to activate auto capture date and time on photos taken from Android.
But then I came across this nice app to add a time stamp on photos. Below are the steps to enable auto capture date and time on photos taken from Android.
Steps To Auto Capture Date And Time on Photos taken from Android:
Step 1: Login to Android Market.
Step 2: Search for “eCamera” app in Android Market.
Step 3: Tap on install option to install the app.
Step 4: Launch eCamera app on your Android phone.
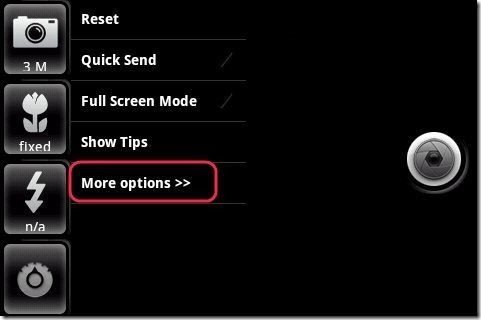
Step 5: Tap on the drop like icon at the bottom of the app.
![]()
Step 6: Go to more option from the menu bar.
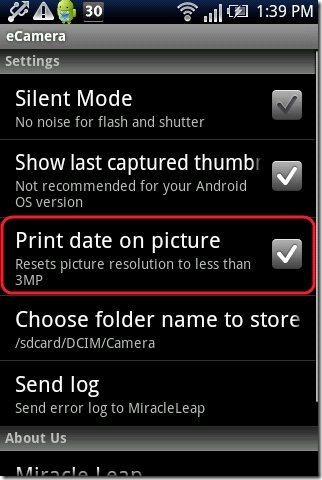
Step 7: Enable “print date on picture” option from the options menu.
Step 8: Now launch the app again on your Android and take a pic from your Android camera.
Step 9: Open your phone’s photo gallery and check the photos clicked. You will see date and time captured automatically on each photo clicked by your Android camera.
You can check out Android Camera app reviewed by us.
Using this eCamera app was easy and now the date and time shows up with all the pictures taken by my Android phone. So now its easy to make out what the photos were all about when I see them after a long time.


