This article explains how to override screen orientation for any Android app. Screen orientation is a setting that automatically adapts to the device orientation. Android OS has a quick toggle that lets you fix the screen orientation to either portrait or landscape, or automatic. This features comes handy but having more control over it can make things better in various cases. For example, I like to keep my screen orientation locked to portrait so that the screen doesn’t automatically rotate no matter what the device orientation is, especially during bedtime. But this becomes annoying when I use apps like VLC media player. VLC plays videos in landscape and shows the media library in portrait (as per my settings). Now, I can get over it by changing the orientation from the toggle but then I’ve to change the orientation again when I’m done with VLC.
Rotation – Orientation Manager is a free Android app that lets you set the default screen orientation for individual apps. Once set up, the app orientation stays the same despite the screen orientation settings. This way, you can set the desired orientation for all your favorite apps and no longer have to toggle the screen orientation back and forth. You can also use this to force apps which don’t support landscape/portrait orientation. It works great for apps with adaption UI but suffers screen loss in other apps.
Also read: How to use Android Phone as a Security Key for Google account?
Override Screen Orientation with Rotation Orientation Manager
To override the screen orientation of any app in Android, go the Play Store, search, and install the Rotation – Orientation Manager app. A link to this app is provided at the end of this article.

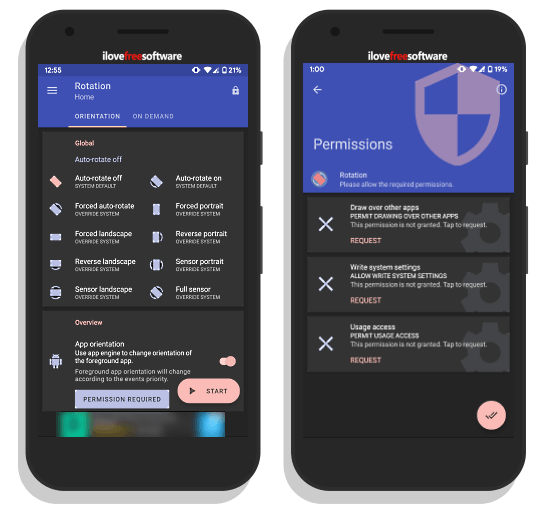
When you open this app, it takes you to the Home section. This section shows you various orientation options to override the default global system orientation. In order to do so, this app requires three permissions. So, go to the ON DEMAND section from the Home section and tap the permissions. Then, allow this app all those permission. Once done, you can set any of the following orientations and it will be applied to the whole OS including all the apps:
- Forced auto-rotate
- Forced Portrait
- Forced Landscape
- Reversed portrait
- Reversed Landscape
- Sensor Portrait
- Sensor Landscape
- Full Sensor
Note: To make this work, you have to click the Start button present at the bottom right corner of this app. This adds a notification in the drawer in order to keep the service running.
Set Orientation for Individual Apps

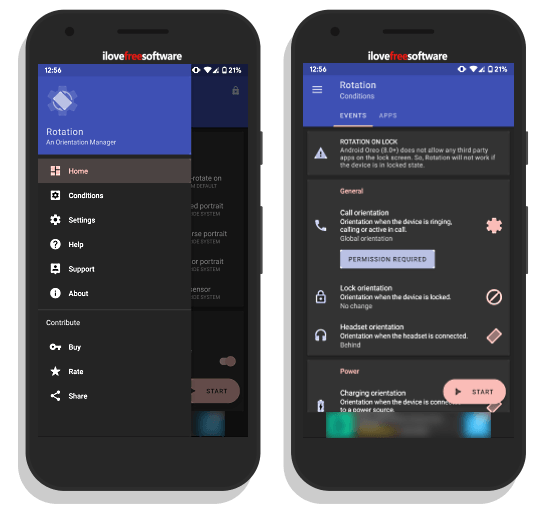
To set the orientation for individual apps, open the app index by swiping from the left side and go to the Conditions section. The Conditions section has two subsections: Events and Apps.
From the Events subsection, you can set the orientation for various events, such as
- Lockscreen Orientation
- Call Orientation
- Headset Orientation
- Charging Orientation
- Dock Orientation
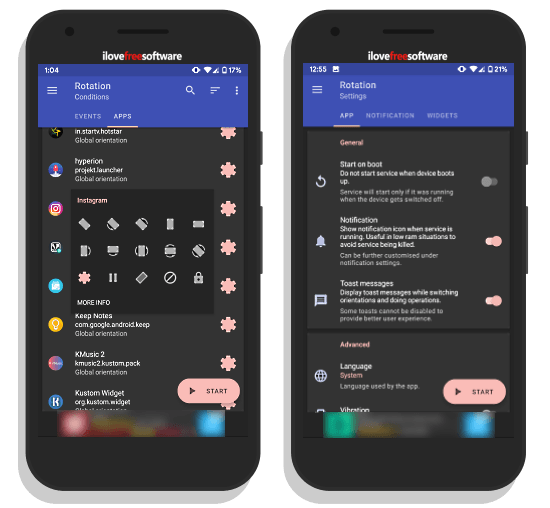
And, from the Apps subsection, you set the default orientation for each app.

This section lists all your apps which you can sort either by categories (System/User) or by names. From here, when you tap on any app, it asks you to select the default orientation for that app. Here, you can set the desired orientation for any app.
To make this work automatically even after a reboot, give this app permission to auto start on boot from the app settings.
Closing Words:
This is how you can override the default screen orientation of any app on your Android phone. This way, you can enjoy your favorites apps in the desired orientation without toggling the system orientation. Upon set up, do remember to start the service in order to make it work.